Vue.js
서버 데이터 바인딩 실습 - Axios, postman, mock서버
Judith Hopps
2022. 9. 1. 17:12
반응형
Axios란?
Vue 프로젝트에서 서버와의 통신을 위해 가장 많이 사용하는 패키지 중 하나
서버와 데이터를 송수신 할 수 있는 HTTP 비동기 통신 라이브러리
Promise 객체 형태로 값을 return한다.
터미널에 아래 명령어를 입력하여 설치해준다.
npm install axios --save
- src/mixins.js파일을 생성해주세요
import axios from "axios";
export default {methods: {async $api(url, method, data) {return (await axios({method: method,url,data,}).catch((e) => {console.log(e);})).data;},},};
- main.js 파일을 아래와 같이 수정해주세요
import { createApp } from "vue";
import App from "./App.vue";import router from "./router";import mixins from "./mixins";
const app = createApp(App);app.use(router);app.mixin(mixins);app.mount("#app");
- mock 서버에서 add request를 클릭 한 후 list를 작성해주세요
- 그 후 add example를 클릭 한 후 body에 아래 문장을 추가해주세요.
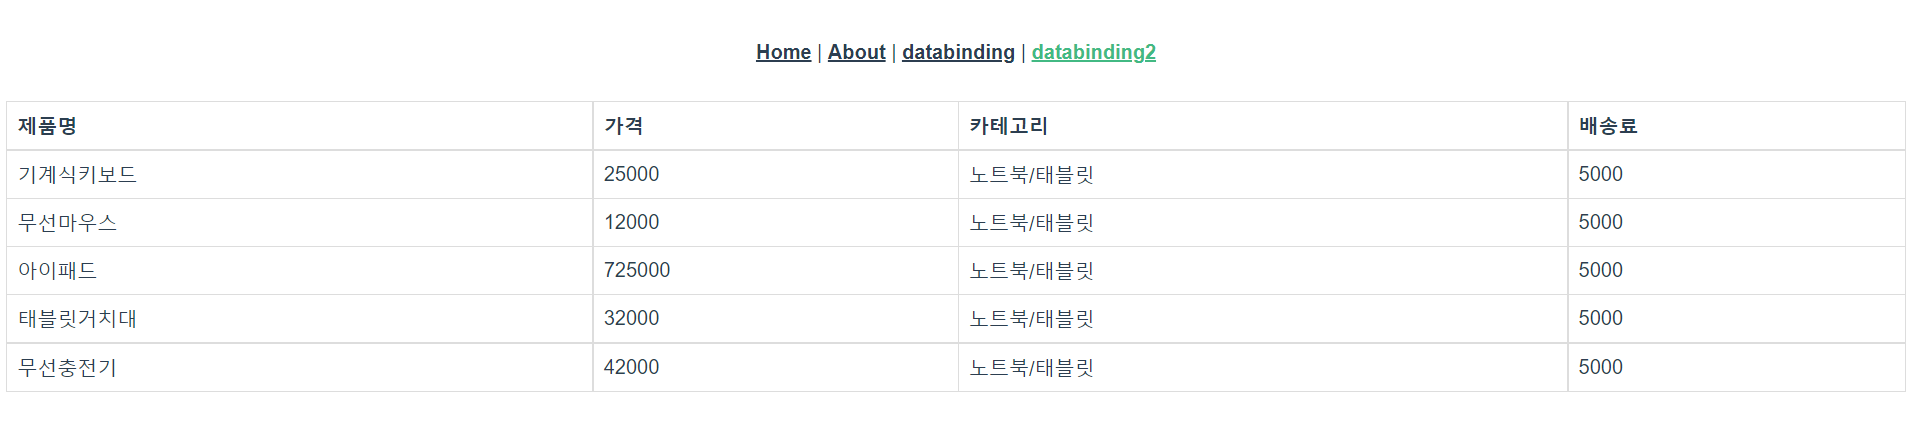
[{"product_name":"기계식키보드","price":25000,"category":"노트북/태블릿","delivery_price":5000},{"product_name":"무선마우스","price":12000,"category":"노트북/태블릿","delivery_price":5000},{"product_name":"아이패드","price":725000,"category":"노트북/태블릿","delivery_price":5000},{"product_name":"태블릿거치대","price":32000,"category":"노트북/태블릿","delivery_price":5000},{"product_name":"무선충전기","price":42000,"category":"노트북/태블릿","delivery_price":5000}]
- src/views 파일을 열어 DataBindingList2.vue를 생성후 아래 문장을 기입해주세요.
<template>
<div><table><thead><tr><th>제품명</th><th>가격</th><th>카테고리</th><th>배송료</th></tr></thead><tbody><tr :key="i" v-for="(product, i) in productList"><td>{{ product.product_name }}</td><td>{{ product.price }}</td><td>{{ product.category }}</td><td>{{ product.delivery_price }}</td></tr></tbody></table></div></template>
<script>export default {data() {return {productList: [],};},created() {this.getList();},methods: {async getList() {this.productList = await this.$api();},},};</script><style scoped>table {font-family: arial, sans-serif;border-collapse: collapse;width: 100%;}td,th {border: 1px solid #dddddd;text-align: left;padding: 8px;}</style>
※ 링크 확인하는 방법
mock서버를 run한 후 console창에 뜨는 링크 확인하기

- router/index.js 파일을 열어 수정하기
- 기본적으로 home화면에 뜨는 링크를 제시하는 js파일이기 때문에 모든 실습에서 자동적으로 import 필요하다.
import { createRouter, createWebHistory } from 'vue-router'import HomeView from '../views/HomeView.vue'import DataBinding from '../views/DataBinding.vue'import DataBindingList2 from '../views/DataBindingList2.vue'
const routes = [{path: '/',name: 'home',component: HomeView},{path: '/about',name: 'about |',// route level code-splitting// this generates a separate chunk (about.[hash].js) for this route// which is lazy-loaded when the route is visited.component: () => import(/* webpackChunkName: "about" */ '../views/AboutView.vue')},{path: '/databinding',name: 'DataBinding',component:DataBinding},{path: '/databinding2',name: 'DataBinding2',component:DataBindingList2}]
const router = createRouter({history: createWebHistory(process.env.BASE_URL),routes})
export default router
모든 작업이 완성되면 아래와 같은 화면이 뜬다.
반응형